Eocortex Cloud Mobile (Andrroid) is the Android application designed for watching video and listening to audio in real-time mode and from the archive. Connect to the Eocortex Cloud remote server to access the video. Use IP-address or URI to connect to server. Any available network connection type may be used to connect to the server. The connection must provide access to the server by its address and have adequate bandwidth.
Connect to the Eocortex Cloud remote server to access the video. Use IP-address or URI to connect to server. Any available network connection type may be used to connect to the server. The connection must provide access to the server by its address and have adequate bandwidth.
Installation of the mobile client for Android
Installation of the mobile client for Android
To install Eocortex Cloud Mobile (Andrroid) mobile client app on an Android device, find the installation package using eocortex cloud key word in Google Play, then download and install it.
Operation of the Android mobile client
The control is performed using Android standard methods.
The app can operate both in portrait and landscape mode.
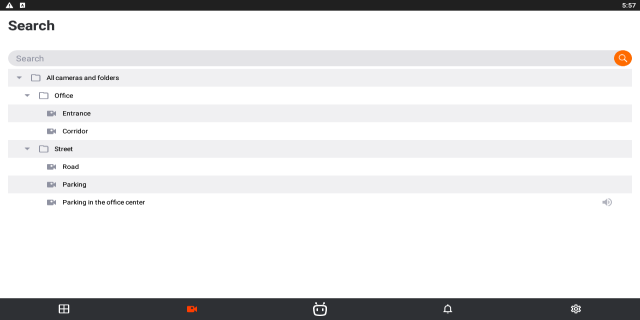
Viewing in the grid mode

Touching a camera in a cell expands the image from this camera to full screen.
Upon a long press in a camera cell a context menu is opened allowing to select another camera in this cell for viewing or clear the cell.
The following navigation buttons are located in the lower part of the screen:
-
 : View selection.
 -
 : Selection of camera for full screen viewing.
 -
 : Reviewing notifications.
 -
 : Opening settings.
A long press in the cell opens the context menu that allows to change or hide a camera in this cell.
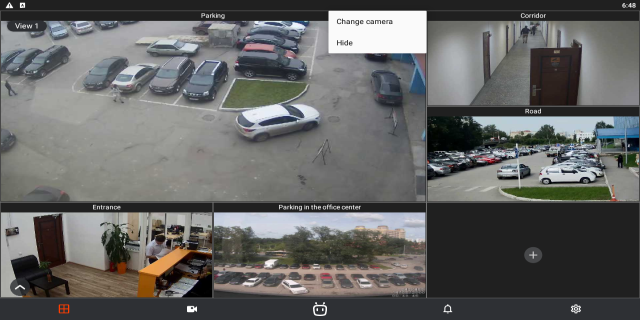
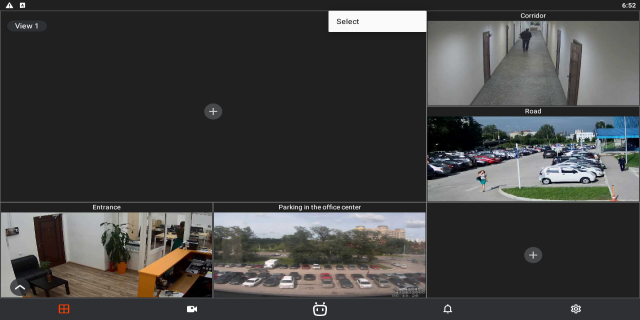
If no camera is selected in the cell, then the context menu allowing to select a camera can be opened by pressing the  button.
Selecting a view
The view selection menu is opened when
the ![]() button is pressed.
button is pressed.
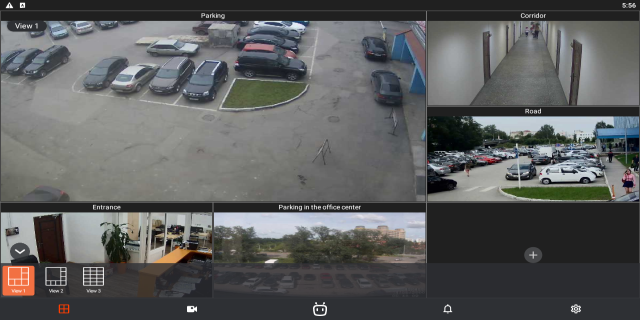
A view is the preliminarily set up screen grid with the cameras already placed in the cells.
It is possible to select views preset centrally by the system administrator as well as the views set by the current user of a given device.
Selecting a camera
Pressing the button opens the camera selection window. When a camera is selected, it is opened in a full screen mode.
Notifications
Pressing the button opens the notifications window.
![]()
Full screen view
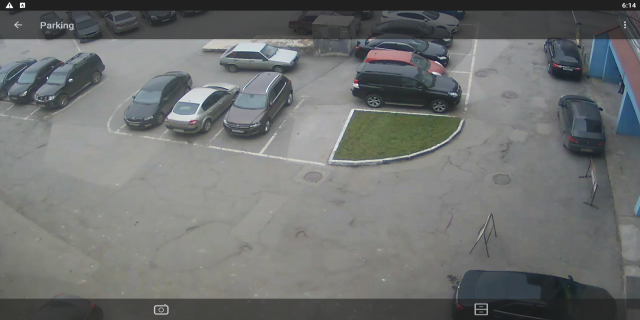
In the full screen mode, the following actions are available by pressing the corresponding buttons:
-
 : Save a frame to your device’s Images.
 -
 : Open PTZ camera controls (only for PTZ cameras).
-
 : Go to viewing video archives.
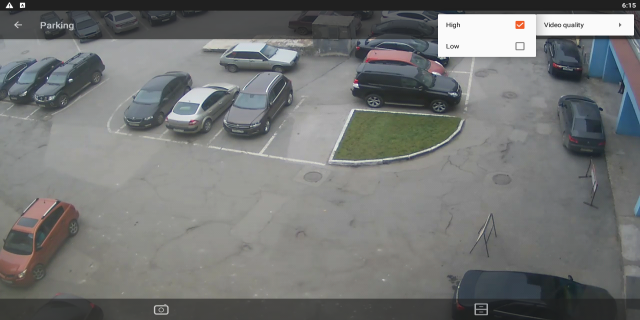
Pressing the  button opens the menu where it is possible to turn on and off the sound on a channel as well as to select the image quality. It should be borne in mind that the higher the quality, the larger is the amount of data transmitted via the network.
PTZ
For PTZ cameras, pressing
the button displays the on-screen joystick
and other camera controls.
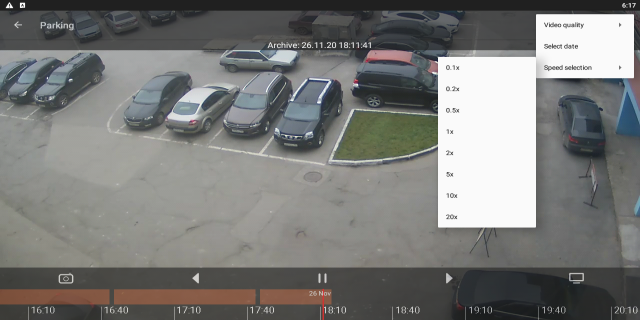
Archive
To play back the camera archive, it is required to expand it to the full screen mode in the viewing mode and press
the on-screen button.
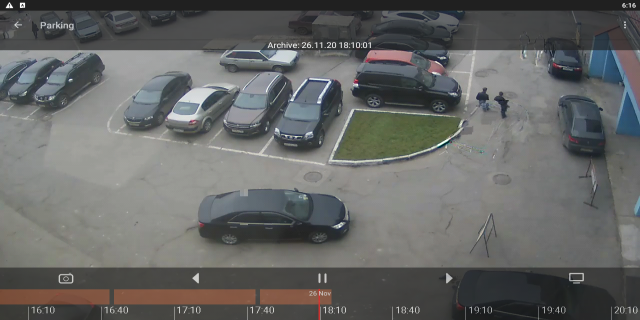
The archive fragment panel superimposed on the timeline is located in the lower part of the screen. To find a required point in the archive, touch the screen in the corresponding place.
The following actions are available in the archive playback mode by pressing the corresponding on-screen buttons:
-
: Save frame to your device’s Images.
-
 : Return to viewing real-time video.
Pressing the button opens the menu where it is possible to turn on and off the sound on a channel as well as to select the image quality, playback speed and the date and time to start the playback from. However, the higher the quality and speed, the larger is the amount of data transmitted via the network.
Settings
Press the button to go to settings.
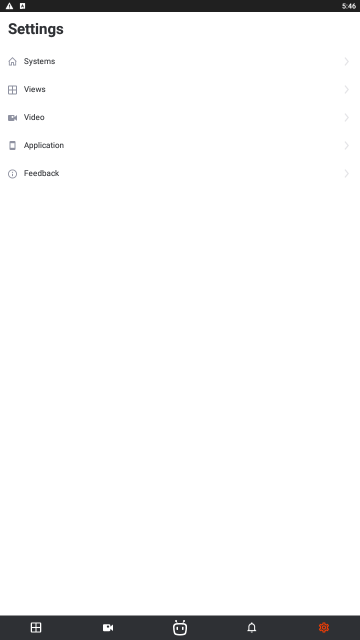
Settings screens are described below.
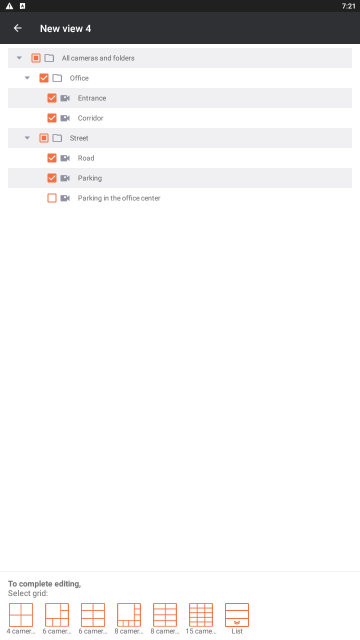
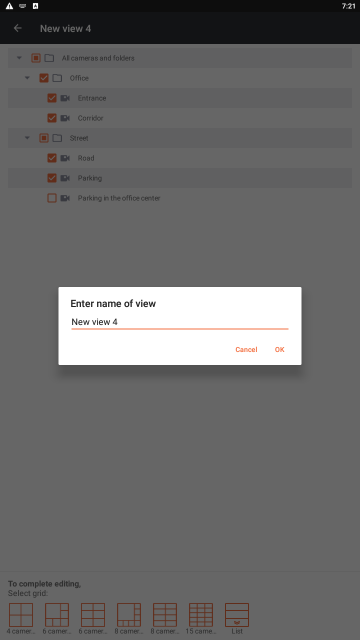
Views
Views are screen grids with cameras placed on them.
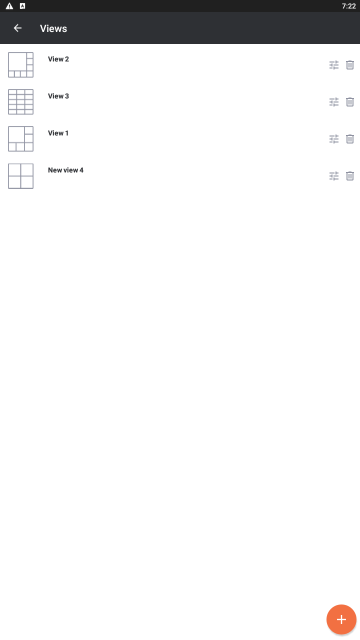
When adding and modifying a view, it is required to select the cameras, then choose a screen grid, and finally name the view.
Video setup
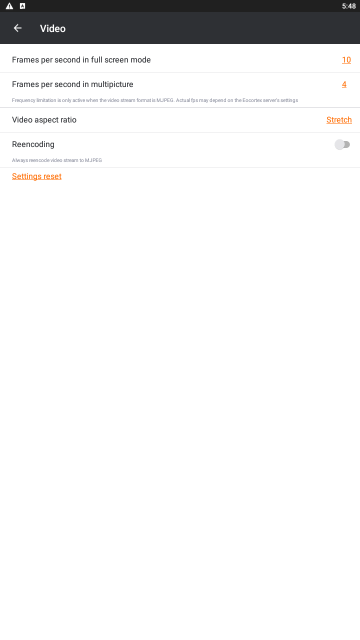
Before setting framerate and reencoding, it is advisable to consult the video surveillance system administrator since these settings may not work on all the cameras and may also be ineffective.
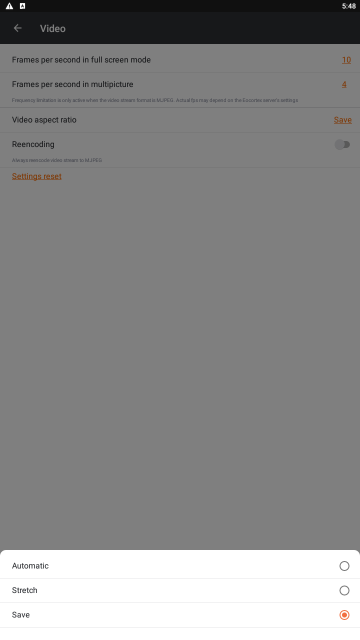
The Video aspect ratio setting allows to choose how the video will be scaled in the cells:
- Automatic: the application automatically determines if the image is to be stretched or the aspect ratio is to be preserved.
- Stretch: the image will be stretched in the cell;
- Save: the aspect ratio set by the camera will be used.
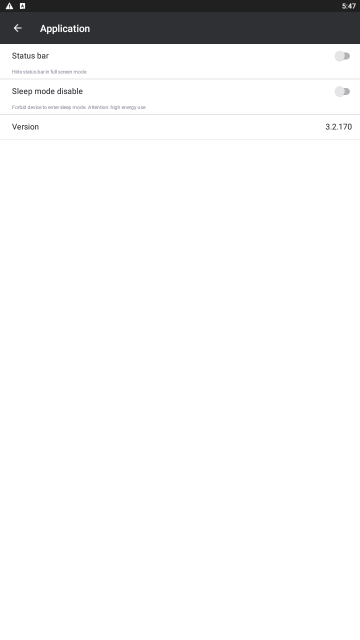
Application settings